Exploring the stunning landscapes of the Cíes Islands is a dream come true for nature lovers and hiking enthusiasts alike. Renowned for their crystal-clear waters and pristine white beaches, these islands also hide a treasure trove of hiking trails that unveil breathtaking views, unique wildlife, and rich plant life. Join us as we delve into the best hiking routes in the Cíes Islands and share useful tips to enhance your adventure among these natural wonders.
Understanding the Cíes Islands
Before we embark on the best hiking routes in the Cíes Islands, let's clarify a few essential points:
Point 1: The Cíes Islands are an archipelago made up of three main islands: Monteagudo (the North Island), Faro (the Middle Island), and San Martiño (the South Island). The first two islands are connected by a bridge and the famous Rodas Beach, while the southern island remains isolated with no ferry access. As such, the hiking routes we will discuss are exclusively on the North and Middle Islands.
Point 2: We recommend starting your hiking adventures from the Information Center, which serves as the main hub for all routes on the Cíes Islands.
→ Did you know that visiting the Cíes Islands requires a permit? Check out our guide on how to get to the Cíes Islands and request your permit.
→ Don't miss our comprehensive guide for visiting the Cíes Islands (with all the necessary information).
Best Hiking Routes in the Cíes Islands
Route 1: Faro de Cíes
- Distance: 6.7 km (round trip)
- Duration: 2 hours
- Difficulty: Medium
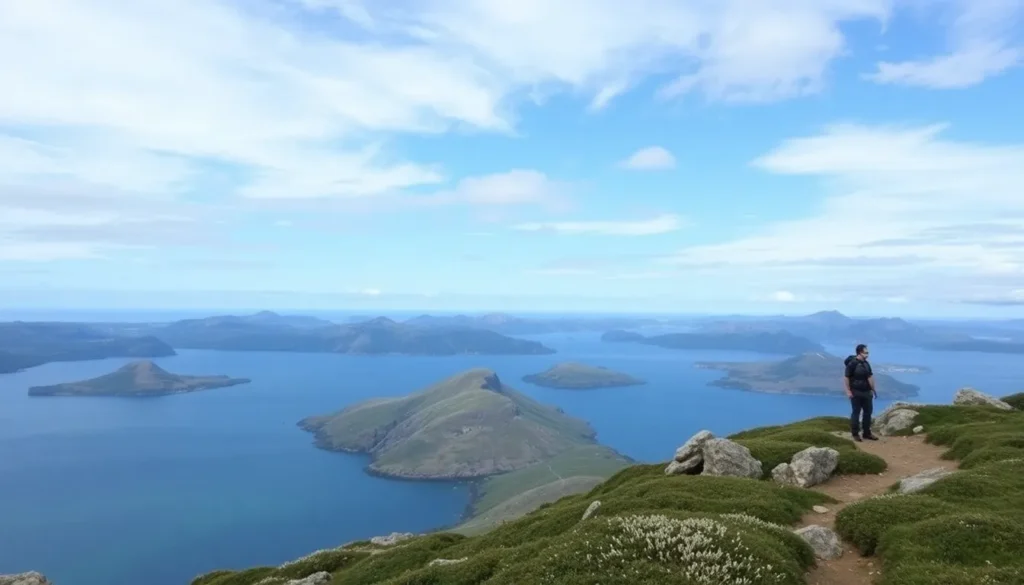
Starting with this trail, you will reach one of the highest points in the archipelago, standing at 175 meters above sea level. This route leads you to the southern tip of the Middle Island, where you'll be rewarded with stunning views of the South Island on one side and the breathtaking Rías Baixas on the other, including the Ría de Vigo and the distant Ons Island.
The hike begins at the back of the camping area. After about 200-300 meters, you'll find a right turn that leads into the forest. Although the markers indicate to keep going straight, this shortcut takes you through a steeper path that is shorter and leads directly to Pedra da Campá, a rock formation with a hole resembling a photo frame. Here, you’ll be greeted with your first spectacular views overlooking a cliff, often accompanied by soaring seagulls.
After around 200 meters, you’ll reconnect with the main trail heading southeast towards the Faro de Cíes. The incline is gentle but consistent until you reach the final zigzagging section, which becomes steeper but remains manageable. Throughout this section, you'll see the Faro da Porta below you (which is not connected to any trail) and further along, the South Island, featuring the beautiful San Martiño Beach.
On your return, you can follow the recommended route, which is longer but much gentler, taking you through wooded areas. After about 2 km, you’ll encounter a junction: right leads to Faro da Porta (1.2 km), straight will take you to a refreshing dip at Playa de Nosa Señora (just 100 meters), and to the left is the return path to the camping area, the information center, and the pier (1.4 km).
Route 2: Faro da Porta
- Distance: 5.4 km
- Duration: 1 hour 45 minutes
- Difficulty: Low (round trip)
This trek offers a pleasant walk along the coast with some of the best views of the South Island, featuring minimal elevation gain, making it ideal for families with small children or those who prefer flatter paths. However, if you’re seeking more breathtaking vistas, the Faro de Cíes route is the better choice.
The initial 1.5 km of this route overlaps with the previous one. At the three-way junction, continue straight towards Faro da Porta. This stretch is 1.2 km along the coast, with little elevation until you reach the charming lighthouse, the closest point to the South Island.
Route 3: Alto do Príncipe
- Distance: 3.2 km (round trip)
- Duration: 1 hour (plus 15 minutes for photos!)
- Difficulty: Low
Although its height is not particularly notable (only 115 meters), this is the most popular viewpoint in the Cíes Islands, where you can capture the famous postcard shot seen countless times on social media. It truly deserves its acclaim, and I can confidently say that it's one of the most stunning viewpoints I've encountered in all my travels. If you must choose just one hiking route in the Cíes Islands, make it this one.
Starting from the information center, head north. The first turn you encounter will lead to Playa de Figueras (a nudist beach), but continue straight to keep climbing.
After about 1 km, you’ll reach a left turn. This last section, spanning around 700 meters, features a slight incline through pleasant shaded areas. The final 30 meters of the Alto do Príncipe involves traversing over rocks, leading you to a dizzying cliff where the coveted panorama awaits. Take a moment to fully enjoy the view!
Route 4: Faro do Peito
- Distance: 4.8 km (round trip)
- Duration: 1 hour and 30 minutes
- Difficulty: Low
While the Faro do Peito itself may not be the most aesthetically pleasing lighthouse and lacks a prime location, this route provides an excellent opportunity to immerse yourself in the more wild and natural aspects of the Cíes Islands. Throughout the trail, you will encounter several stunning viewpoints.
Following the same trail north as the previous route, you will bypass the junctions to Playa de Figueras and Alto do Príncipe. After about 1.5 km from the start, you will reach the Ferreiriños area, which offers stunning views teeming with seabirds.
About 400 meters from there, you’ll come to a fork where you’ll begin a circular route around the northern part of the island. I initially chose the clockwise direction, taking the left path which ascends slightly, leading to a birdwatching viewpoint.
From here, you will descend to the Faro do Peito. Although it may not boast a breathtaking location, be sure to explore the final descent from the lighthouse to a natural cave, carved out by the waves. While it’s not accessible, the site is intriguing, and the cliff is home to a colony of cormorants that you can easily spot clinging to the sheer walls or hunting in the water.
Return via the opposite side of the circle, retracing your steps back.
Combining Routes 4 and 3
- Distance: 6.3 km (round trip)
- Duration: 2 hours
- Difficulty: Medium (due to distance)
While the Faro do Peito is considered a separate route, I recommend combining it with the ascent to Alto do Príncipe for a super comprehensive hiking experience in the Cíes Islands. This is what I did, and I wholeheartedly recommend it, especially since both trails share the initial section. If you start in the afternoon, you may even catch the sunset from the Alto do Príncipe viewpoint, one of the best spots to enjoy this magical moment.
Essential Tips for Hiking in the Cíes Islands
Here are some valuable tips to prepare for your hikes on the trails of the Cíes Islands:
- One of the best pieces of advice is to use the Maps.me app, which realistically marks the trails, elevations, and expected durations. Download the maps before heading out to use them offline, and mark the points your routes will take you.
- Although none of the trails are particularly challenging, some sections are rocky, so wearing closed footwear is advisable.
- Apply sunscreen and bring along water, some snacks like bananas or cookies, a hat, and warm clothing if you're hiking at dawn or dusk, as temperatures drop in higher areas and the wind can be quite strong.
- If you need water or other essentials, there’s a supermarket at the camping site offering basic products. For instance, a 1.5-liter bottle of water costs about 1.30€.
- There are no storage services on the island, so if you come for the day and need a place to leave your heavier, less valuable belongings (like beach umbrellas or portable coolers), it's common for visitors to leave them next to the information center. While not supervised, people have reported no issues.
These are the four hiking routes in the Cíes Islands. Have you taken any of them? Share your experience with us!
| Save on your trip |
| Compare and find cheap flights here |
| Find accommodation at the best prices here |
| Book activities and tours in Spanish here |
| Get a 5% discount on your travel insurance with IATI here |
| Reserve transfers from the airport here |
| Gift of 10€ when booking transport across Europe here |
| Learn how to withdraw money without commissions here |
| Get a 5% discount on your eSIM from Holafly here |
| Rent a car with the best deals here |
| Compare prices for van rentals here |
| The best books and travel guides here |
| All our articles about Spain |
En este sentido, te invitamos a ver un video que explora las mejores rutas de senderismo en las Islas Cíes, donde podrás disfrutar de su impresionante belleza natural.
 of Vigo! | Travel vlog #28")